


Welcome to Kurt's John Paul Jones Model
Thanks for stopping by. I am starting this page off small, posting a few pictures I just took with my new digital camera. Check the contruction pages for details on how I made the various parts of the ship, and how you can build a similar model if you choose.
Click on any of the images to see a larger version; use your browser's back button to return to this page.
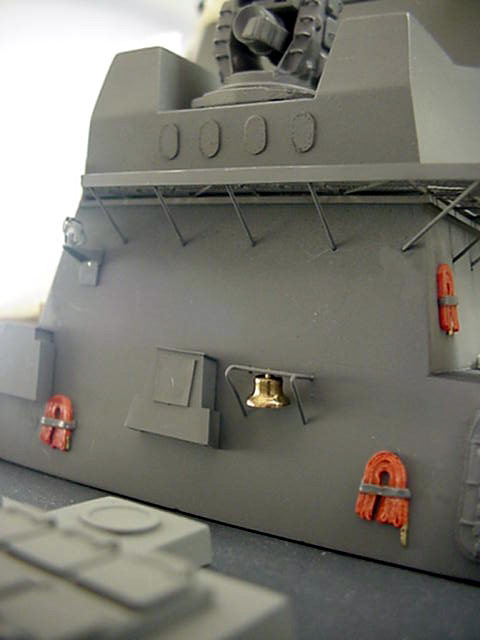
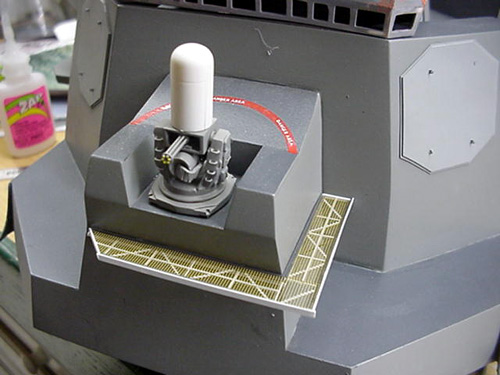
June 8 - finished painting and installing the gear around the 02 level. Nice to see a section complete!
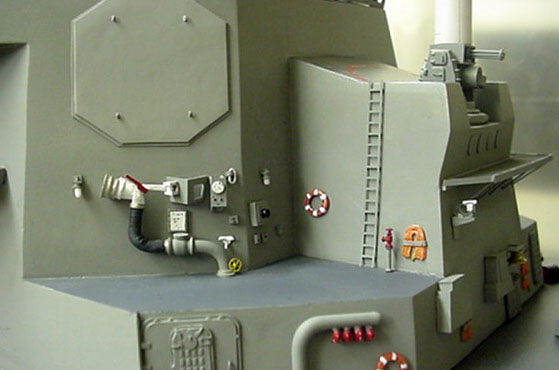
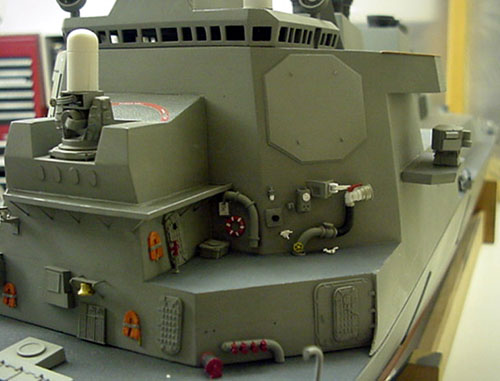
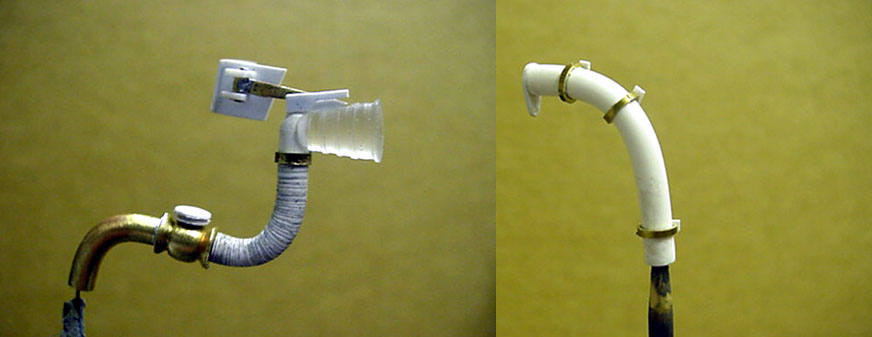
June 2003 - It has been a while since I have had a chance to work on the old girl, but I hope to get some done over the summer. Starting with detailing the 02 level in front of the bridge, with the Unrep Gear. I built these out of brass, plastruct tubing for the hose (groved in the lathe with a wood chisel before heating and bending) and Evergreen strip styrene.
Another new part is the Mk 46 Optical Sight, which will be mounted above the bridge in front of the forward illuminator. This was built mainly of Evergreen plastic, with a turned acrylic base. I used my Historex punch set a lot on this project, for all the small discs and cut outs.
October 12, 2001 - just another picture of the bow area, not much free time lately, but did add a few things.
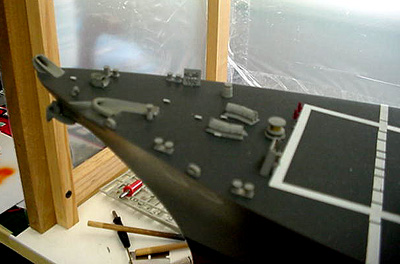
August 13, 2001 - here are a couple of shots of the bow area and bridge front - detailing proceeeding well, but some more items are needed. Stay tuned!
July 2001
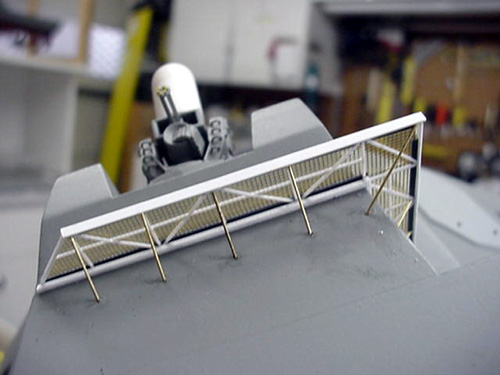
I installed the forward CIWS catwalk today. The struture needed to be light in appearence, but strong to stand the handling of a R/C model. To build it, I used two of the smallest "L" shaped plastruct strips, taped to the outside of a 3/8" wide piece of wood to establish the distance. Then, I glued .020 x .030 strips on the bottom in the manner of the prototype. Once the cross braces were installed and dry the parts were surpisingly strong. To simulate the grating, I used Special Shapes Company stock number SSM-60 Etched Brass Mesh, which very much like the pattern on the real ship.
Here are a couple of new parts that I am making for the model:
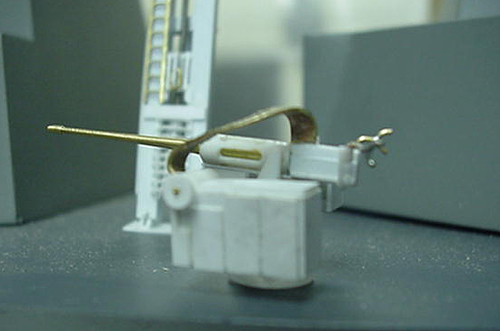
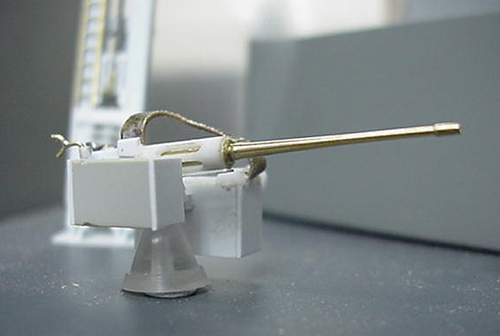
Nobody makes a Bushmaster in 1/96 scale, so I had to scratchbuild one for my model. It is made from Evergreeen styrene and brass. The gun barrel was turned on the lathe, using the watchmaking technique of graving, as opposed to a cutting bit. This allowed me to get it down to near scale diameter, and also have a scale bore. The ammunition belt is made from a brass rod, bent into shape, annealed into softness, and hammered flat - this is how I got the compound curve. It required 4 annealing treatments before the final shape was established. A fun little project!

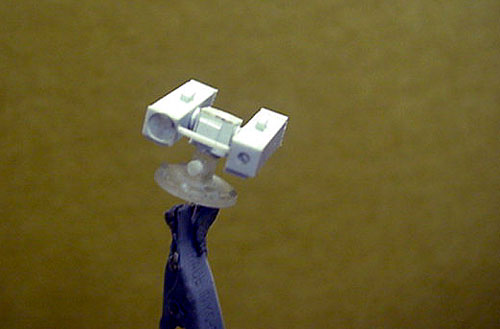
I wanted to try my hand at making my own Mk 32 Torpedo Tubes, without the neccesary compromises inherent in a product designed for casting. What do you think?

This is a sliding padeye, one of two that I am making for the model. It is built out of Evergreen strip stryrene, mostly. The semi-circular motor guards at the bottom (which need a bit of straightening, I see <g>) were made by wrapping .030 styrene rod around a brass tube, and dunking into a cup of hot water. When it cooled, the rod sprang back to the diameter I needed, and I cut in into the sections needed for the part.

The SLQ-32 ECM unit. You are looking at a rather blurry picture of a pattern that I made for casting the 2 units I need for the JPJ. The pattern was made from Acrylic, with plastic details. It is in three parts; they are sitting on top of each other for the picture. It will be sent down to the Scale Shipyard for casting.
 In the water just prior to the June, 2000
San Diego regatta, sporting her new helicopter and warning markings made
with Microscale solid color decals. The "danger area" lettering was
from the Gold Medal Models 1/96 scale decal sheet.
In the water just prior to the June, 2000
San Diego regatta, sporting her new helicopter and warning markings made
with Microscale solid color decals. The "danger area" lettering was
from the Gold Medal Models 1/96 scale decal sheet.
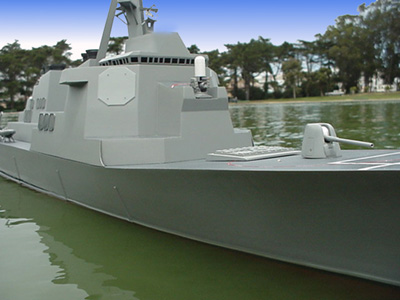 Looking low at her bridge. She will look better when I get some
more detail on her, though!
Looking low at her bridge. She will look better when I get some
more detail on her, though!
 Getting
that expensive new digital camera periously close to the water.....!
Getting
that expensive new digital camera periously close to the water.....!
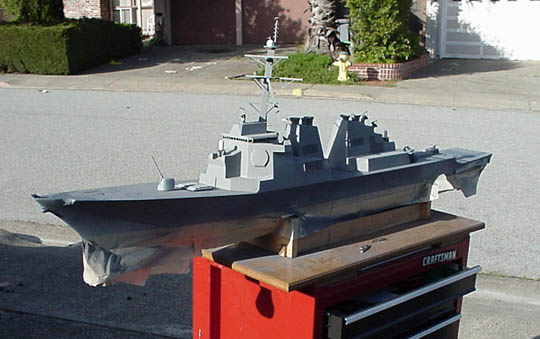
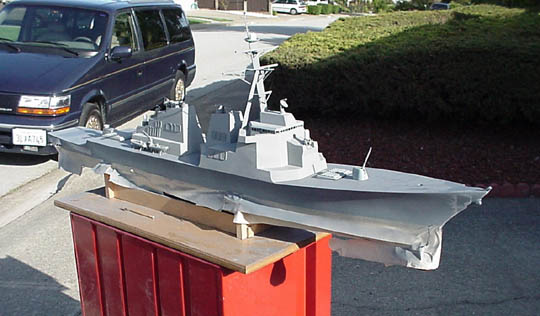
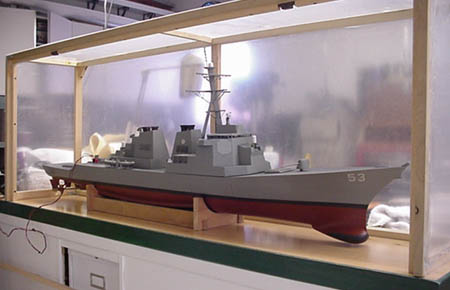 In this view, I have just completed painting
the hull and superstructure. The first of the detail subassemblies
have been pinned and glued into place - the RIB crane, the missile directors,
the CIWS and the stacks. Note the temporary protective case around the ship.
This was constructed out of strip pine and 2 mil plastic sheeting and
protects the now painted model from shop dust. A removable front cover
allows access to the model for work.
In this view, I have just completed painting
the hull and superstructure. The first of the detail subassemblies
have been pinned and glued into place - the RIB crane, the missile directors,
the CIWS and the stacks. Note the temporary protective case around the ship.
This was constructed out of strip pine and 2 mil plastic sheeting and
protects the now painted model from shop dust. A removable front cover
allows access to the model for work.
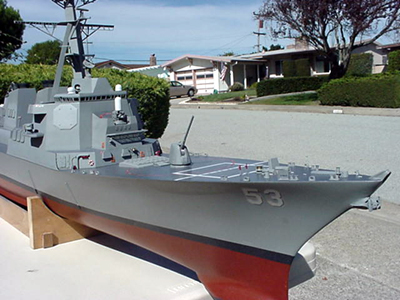
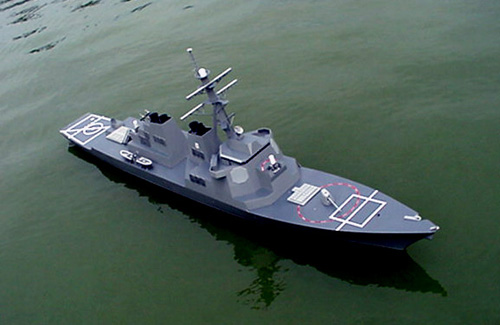
 First time out on the water with her
new paint job. I still need to put on the helicopter markings though,
which should be an interesting job <grin>... The hull numbers
are from Loren Perry's Gold Medal Models, and they have been dusted over
with a light coating of Agressor Gray from Model Master, my hull color, to
simulate the low-viz lettering the Navy uses these days.
First time out on the water with her
new paint job. I still need to put on the helicopter markings though,
which should be an interesting job <grin>... The hull numbers
are from Loren Perry's Gold Medal Models, and they have been dusted over
with a light coating of Agressor Gray from Model Master, my hull color, to
simulate the low-viz lettering the Navy uses these days.
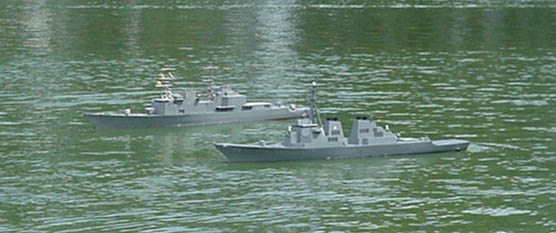 Running with my buddy Ryan's USS Fletcher
- one of the joys of constant scale modeling!
Running with my buddy Ryan's USS Fletcher
- one of the joys of constant scale modeling!
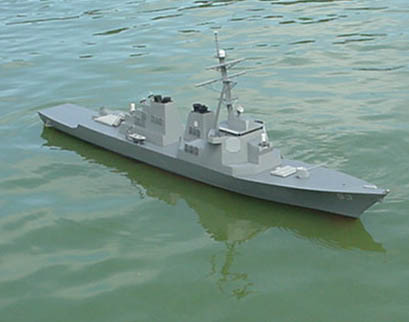
 Here is an overall view of the John Paul Jones
 And yet another!
![]()
In this shot, the deck has been installed, but not painted. You can see the internal hull cross bracing.
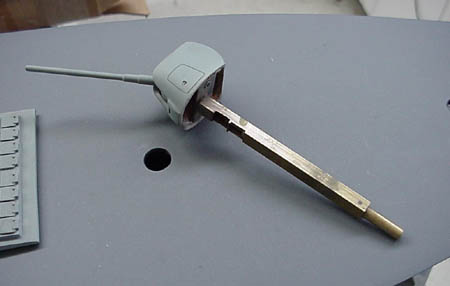 My 5 inch mount rotates
and elevates using a very simple mechanism - a counterweight that is driven
by a servo arm to compensate for the weight of the barrel. For more
information on this click
here.
My 5 inch mount rotates
and elevates using a very simple mechanism - a counterweight that is driven
by a servo arm to compensate for the weight of the barrel. For more
information on this click
here.
Click here for a 5 second video showing the action (120 KB)
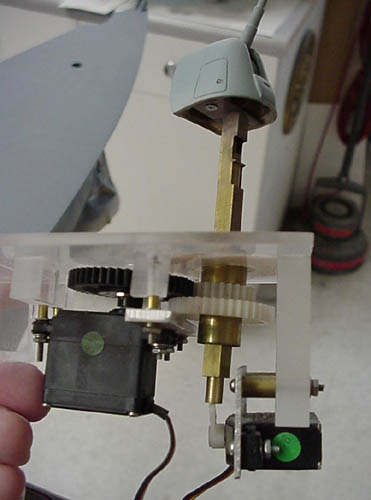 The mechanism under the deck uses one servo for traversing the
mount, and another to elevate the gun. A square tube assures alignment,
and also holds the mechanism relative to the deck.
The mechanism under the deck uses one servo for traversing the
mount, and another to elevate the gun. A square tube assures alignment,
and also holds the mechanism relative to the deck.
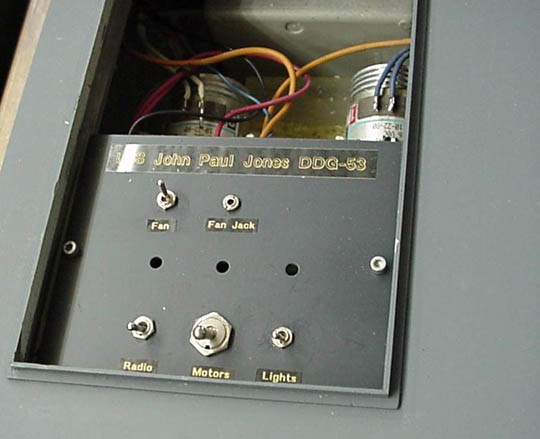 The main switch power is
the electrical distribution point for the model's systems. It is located
under the aft superstructure. The plug on top receives the jack for
the two cooling fans, which are mounted in the aft superstructure. These
were installed above the motors to help cool them, as they were running a
bit warm. The air exhausts through the forward exhaust stacks.
The main switch power is
the electrical distribution point for the model's systems. It is located
under the aft superstructure. The plug on top receives the jack for
the two cooling fans, which are mounted in the aft superstructure. These
were installed above the motors to help cool them, as they were running a
bit warm. The air exhausts through the forward exhaust stacks.
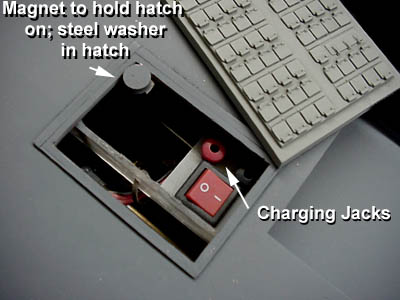
A remote panel under the aft VLS allows access to the main power switch and charging jacks, so that the aft superstructure does not need to be handled as much.
 My two RIB's and the crane that
serves them. The boats are Scale Shipyard parts, modified, and the
crane is scratchbuilt.
My two RIB's and the crane that
serves them. The boats are Scale Shipyard parts, modified, and the
crane is scratchbuilt.
 Another view of the RIB. The
outdrive and motor cover were scratchbuilt. The control counsel
has been modified, as has the bow of the boat.
Another view of the RIB. The
outdrive and motor cover were scratchbuilt. The control counsel
has been modified, as has the bow of the boat.
 One of the most challenging parts
of this model has been the mast with it's angles and cross-braces.
There is still much detail to be added.
One of the most challenging parts
of this model has been the mast with it's angles and cross-braces.
There is still much detail to be added.
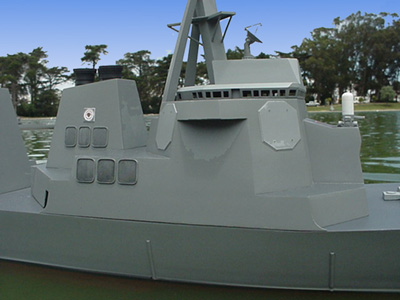
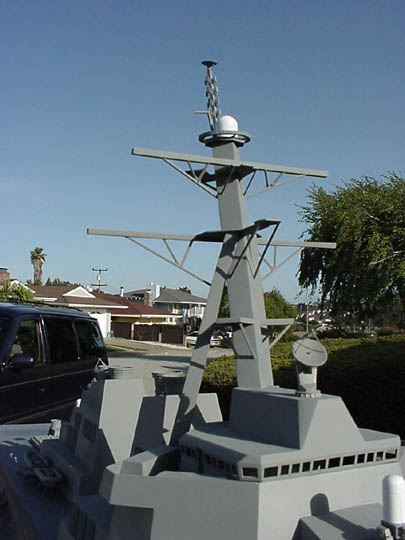 Another view of the mast, and
the bridge below. The bridge windows were made by building up the
frames with styrene strip on a sheet of glass. When the dried overnight,
they were carefully pried loose with a sharp razor blade and cleaned up.
Another view of the mast, and
the bridge below. The bridge windows were made by building up the
frames with styrene strip on a sheet of glass. When the dried overnight,
they were carefully pried loose with a sharp razor blade and cleaned up.
 My CIWS still needs a bit of
cleaning up, but you can see the barrels mounted in it. They are held
in place by 6 pieces of .010 styrene, each drilled with 6 .020 holes to receive
the barrels.
My CIWS still needs a bit of
cleaning up, but you can see the barrels mounted in it. They are held
in place by 6 pieces of .010 styrene, each drilled with 6 .020 holes to receive
the barrels.
Well, that's it for now. Please feel free to email me comments:
![]()

Back to Warship Models Underway

Links to construction articles
68 Visits so far! Thanks for taking a peek!
Version 2.5 06/03. This page maintained by Kurt
Greiner
![]()