
Making and Installing propeller shafts
The purpose of this page is to give you some information on making your own propeller shafts and stuffing boxes.
The best shafts by far for scale model boats are made from quality stainless
steel stock. One source for them is
Marine
Specialties . I get the plain ones and grind a flat in one end
for the set coupler set screw. On the propeller end I grind a slight
bevel to help it enter the prop. I attach the props with
Loctite theadlocking sealer #
271.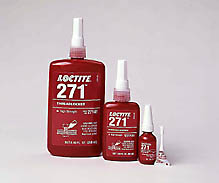
A drop or two of Loctite on the shaft, and then spin the propeller on. You will feel it start to drag and then sieze. After it cures (see directions) it will only be able to be disassembled using heat and a strong mechanical pull. Be VERY careful to clean all traces of the loctite off of the shaft outside of the propeller BEFORE installing the shaft in your model. VERY Careful, or you will make your working model into a static one quickly.
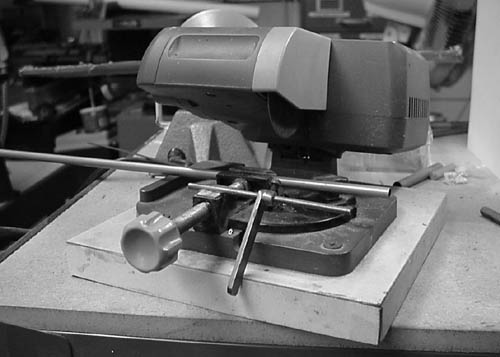
To make the stuffing box for the shaft, I use common K & S Brass tubing, available at any hobby store. Although you can cut it by hand, I really like the electric cut off machine marketed by Micro Mark. You can read more about it here.
Here is an "action" shot, showing the machine in use:
The diameter of the stuffing box is dependent on the shaft diameter, of course. Most larger 1/8" scale warships use a shaft diameter of 3/16", so your bushing would be cut from tubing of that internal diameter. Your stuffing box would be the next larger size. World War II ear Destroyers would have 5/32 shafts, and smaller DD's and combatants would use 1/8" diameter. Size your stuffing boxes accordingly. Once you have cut the stuffing boxes and bushings, deburr the ends with a hobby knife to prevent scratching the shaft when installed.
I like to incorporate an oiling tube in the assembly at the forward busing - for it to work effectively it must penetrate the bushing to allow oil to flow where needed. The oil tube is made from tubing one size smaller than the finished stuffing box.
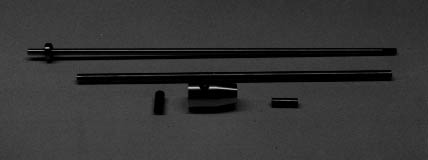
Note, the above shaft has a ball bearing pressed in the end. I have found that this is not needed, which saves a lot of work making a race for the bearing to ride in. Bushings work just fine. Below the shaft are the components for the stuffing box, again the large holder for the bearing is not needed, and can be replace with a small length of tubing to hold the oiling tube.
The oiling tube should be cut to fit a hole drilled in the stuffing box where the bushings will be installed. It is soldered in place, and then a drill or reamer is hand turned to clean out the excess solder inside the box, The bushing is cut away in the vicinity of the oil tube to allow for oil flow to the shaft. The bushings are installed using a small amount of Loctite, carefully applied to the outside of the bushing where it mates against the stuffing box walls. The bushing at the propeller end of the shaft is not cutaway, as it is lubricated by a thin coat of grease mixed with oil applied during shaft installation. Take some scrap shaft material, coat it with oil, and carefully insert it into the bushings to start the break in process. After turning by hand until they rotate easily, remove and flush out the stuffing box with a oil remover followed by water. Blow the interior throughly dry with compressed air.

The finished stuffing box and shaft assembly.
You should support the stuffing box at the motor end with a simple brace made from flat bar soldering onto tubing that slips over the end of the stuffing box. The flat end can be attached to the hull with catalyzed putty. Care should be taken that the support does not put any pressure on the stuffing box which can cause it to go out of alignment. If you stuffing box runs over 6 inches inside the hull, you should put auxillary supports every six inches to adequately support it.
Care and Feeding
It is good practice to remove, wipe, grease and reinstall your shafts after each running session. This is especially true if you run in salt water, or swiming pools (which can have a surprisingly high salt content).
Vibration will wear out bushings very quickly. If you feel any, correct it as soon as you can. Common sources are unbalanced props, and lack of adequate stuffing box support, which can cause the tube to go out of alignment. Always make sure your stuffing box is supported every 6 inches or so.
These bushings should last, with care, many seasons of running.
If your bushings do wear out, they can be replaced without destroying the model, although you may have to rework the area around them. To remove them, clean the tubing out, being sure that no trace of oil remains. Flush out the tube thoroughly with water. Put heat blocking putty (some brands are Kool Jool, or Heat Fence) around the area you will be working to minimize the damage. Apply heat to the area of the stuffing tube around the bushing. Using a hook shaped tool ( heavy brass wire will work) apply steady pressure on the bushing until it pops free. Ream or drill the area, clean and install a new bushing. Dig out any damaged areas and replace with new filler, prime and paint. It sounds like a lot more work than it is!
You will need to drill a hole in the stern of your hull at the appropriate location. Refer to your plans are carefull mark the location with a marker, such as a fine point Sharpie. Tape over the area to reduce chipping of the gel coat, and drill an oversize whole for the shaft. Ideally, the shaft should go through the hole without binding - this is the best way you are not putting pressure on it, which might make it out of alignment.
Be sure to rough up the area in the hull where the shaft penetrates, so your bedding material has a place to grip. Also rough up any support locations.
Take a piece of string, and stretch it down the centerline of the boat, taping it at the bow and the stern. This will give you a good reference. Now take the shaft, and extend it as out the stern of the stuffing box to give you an addtional reference point. By carefully sighting down and comparing the two lines, any errors will be easy to pick up.

Once it is lined up properly, temporarily tack it into place using CA glue and accelerator. Put tape around the hole where the shaft exits the hull to try and conform as closely as possible to the exterior lines - this will reduce the amount of filling and sanding you will need to do later.
Now you can bed the shaft using resin, epoxy, or catalyzed putty.

Note, the round area at the back of the above picture is where the rudder tube penetrates the hull, it is put into place exactly like the shaft. If your model utilizes struts, then they can be installed in the hull the same way - always be careful not to bind the hull by trying to squeeze the shaft or strut through too tight of a hole. Filling holes that are large is very easy if properly done.

Back to Construction Articles
417
Version 2.0 6/01