
Installing a deck on your fiberglass hull
The order for the early construction that I follow is to establish your beam first - so install a deck support strip (can be made out of wood or plexiglass about 3/16 or so) on the inside of the hull, down from the deck edge by the thickness of your final deck, so that when you lay that on the support it is flush with the top of the hull. This assumes that your deck is flush with the edge of the hull, as it is in most warships. If your hull has a molded in bulwark, you will need to recess the deck to account for that, as illustrated by this tug model below.
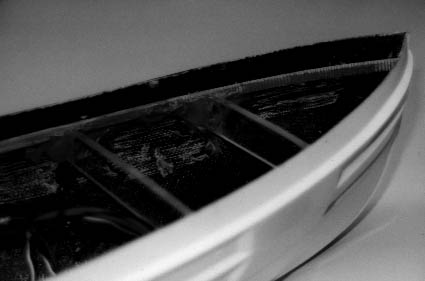
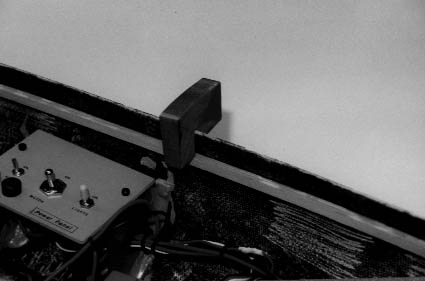
This setting jig will help to assure even placement of the deck edge strip from the top of the hull.
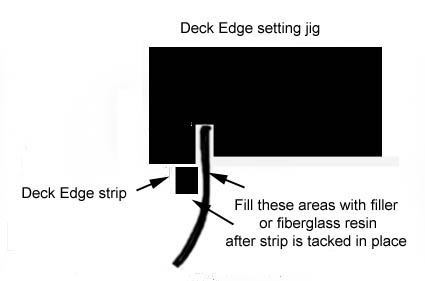

The strip does not need to be tight against the hull, as long as it touches it in at least one place The strip should be superglued to tack it into place, and then reinforced with fiberglass resin poured into the gaps. Before gluing the strip - or anything - to the fiberglass, be sure to rough up the inside of the hull with some 80 grit sand paper or a Dremel tool. See also my page on Working with Fiberglass for more information.
To allow the strip to bend easily in tight places, like the bow and stern, cut small slots with a razor saw about 80% of the way through the strip, every 1/16th of an inch or so. The kerf removed my the saw with allow the strip to be bent easily, and the strip is attached to the hull, you can fill the gaps with catalyzed putty.
Once the interior strip is glued, then you install your cross braces - these determine the beam of your hull, and should be carefully located using your plans to avoid future problems, like blocking interior access, or some working mechanism like a gun turret. The beams should be tacked into place using superglue, and reinforced with bondo. We usually make them out of 1/8" Plexiglas, about 1" high, and drill holes in them at regular intervals to reduce the weight.
![]()
Smaller hulls, like these Fletcher class destroyers, can be crossed braced with Plastruct brand beams, availble at most hobby shops.
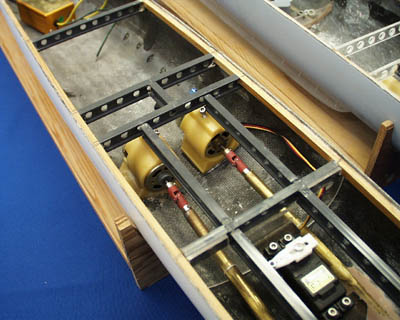
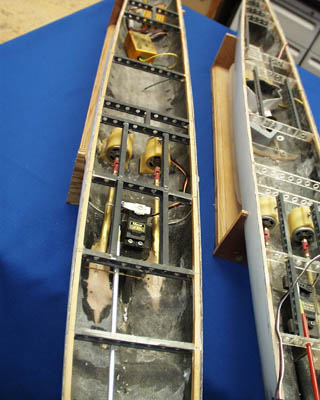
Once the hull has the beams installed, you can put in the running gear and prop shafts. Often installing the beams flexes the bottom of the hull a bit so if you install them first they can be brought out of alignment when the hull is braced.
Once your running gear is installed and tested ( I usually do a run in a protect body of water to make sure there are no problems) you can install the deck. To cut the deck, I take and oversize sheet of lexan and lay it on top of the hull, pressing it down against the sheer line if any.

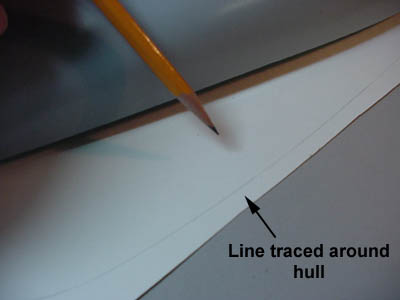
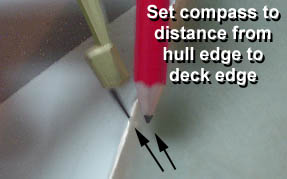
Then I take a pencil and trace around the outside of the hull. Next, pull the sheet off, and take a compass and set it to the distance from the outside of the hull to just inside the deck edge support. You can take the compass and following the line you drew on the lexan, scribe the interior cut line.

Don't worry if this is not exactly to the interior edge of the hull - as long as the deck sites on the support strip, a gap is actually a good thing - as you will see in a minute. Cut the deck out, and peel the paper off the bottom, lay it into place. It should be flush with the deck edge, allowing for the paper on the top. If not, you can shim it with plastic strips. Draw a centerline on the top paper, and tape the deck into place temporarily to hold it in place. You can transfer the superstructure opening(s) by taping a photo copy of your plans directly onto the top paper of the deck. Be very careful about this, make sure you are not fooled by overhangs on the plans and such, that you are cutting to the inside of the lines so you don't make your deck opening too large. It is much easier to enlarge them to fill them once cut! Once you are satisfied with the layout, and have double (even triple) checked it, cut out the deck opening. I have been using spiral cut blades intended for the Roto Zip tool inserted in my Dremel -works great.
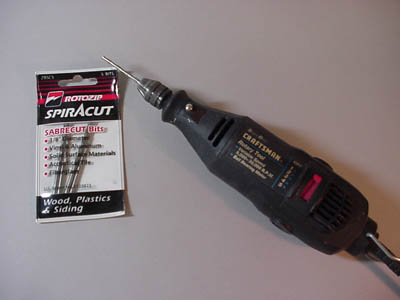
You can get the blades at most large hardware stores, or mail order from Amazon.com among others. Once the holes are cut, you can pull the top paper off, and lay the deck on the cross beams and support strip. If it is not supported in areas, this is the time to add more supports - you don't want your deck to be flimsy - it will give during sanding and be hard to finish well. If your model calls for deck camber, this can be installed but shimming the center of the cross beams to the correct height, and them shimming to the edge so that there is support across the width of the deck. If the deck edge is not supported, you can add material tothe deck support strip at this time. I like to have about a 1/8" gap between deck and hull at this point, but the deck edge must be supported. Lightly sand the bottom of the deck where it will touch the cross supports to increase adhesion - use about 220 grit for this. To glue the deck on, I like to use Weld - On # 16 - this is a thick, tube type glue available at Tap Plastics.

Put a bead along each deck support where the deck touches it, and them lay the deck in place. Tape or use weights to assure even contact. Let the deck dry overnight, and then fill the gap between deck edge and hull with polyester glazing putty - this is a two part, Bondo like substance that is very strong once it cures
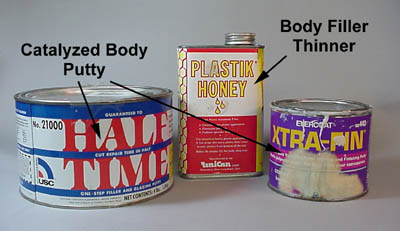
. It will both fill the gap and add strength to the joint - this is why I wanted the 1/8" gap, since it gives more surface area for the glazing putty to work. You can purchase this product at automotive paint store - one good brand is Evercoat, but be sure to get polyester glazing putty, and not regular body filler. Work quickly in small areas, because this product hardens very quickly - within a few minutes. Sand it flush and you are done. The polyester putty will get very hard overnight, so it is best to sand the same day. After it hardens, you can drill it, even tap it, so it will be a good base for stanchions later in the building of the model. By using the gap method, it is not only easier to fit the deck, and stonger, but avoids the hairline cracks that tend to appear after a year or two in other models at the deck edge/ hull joint. Sand the deck and you are ready for a coat of primer!
![]() Please email me your comments
here. Thank you!
Please email me your comments
here. Thank you!

Back to Construction Articles
159
Version 2.1 08/02